Monday, December 24, 2012

a few new Christmas decorations.

I made a few new Christmas decorations for our home this year!


I first saw this idea on Pinterest, but have since seen it all over the place. I used this tutorial as a guide, but didn't do my painting the same. It was pretty easy and cheap to make (using coupons at Michaels), but I had trouble with using just hot glue to attach the letters on the back, like the tutorial instructs. It currently is hanging somewhat precariously on the wall behind my front door and I'm planning to try and secure the letters together with small brackets after the holiday season.


I'm really loving my new clothespin wreath! I used this tutorial as a guide and was able to make it using materials I had in my home already--so it was free. I love free. I didn't have enough clothespins that were all the same size, but I really love that it breaks up the edge of the wreath. I am planning to cover the back side of the clothespins with paper for another season, but I'm not sure what yet. The author of the tutorial did Valentines Day, which would be fun, but I might like to do something that I can use longer, like a spring or summer theme.
 

Thursday, December 6, 2012

hearty minestrone.

The weather finally turned cooler today, so homemade soup was in order. I love this hearty minestrone soup because it is so healthy but really satisfying. It is one of my go-to meatless meals. I have to sneak meatless meals by on my husband--he isn't so much anti-vegetarian as he is pro-meat and anytime I find a filling meatless recipe that he likes I make it over and over again.

I originally found this recipe on Allrecipes, but have since altered it a decent amount. If you make it according to the original recipe, it is still really good, but the measurements below are more to our taste. This recipe makes a ton of soup--so unless you have a crowd to feed, be prepared to eat it for the whole week or freeze it for later (or maybe both--this really makes a ton!).

Hearty Minestrone
(inspired by "Jamie's Minestrone" on Allrecipes)


1 T olive oil
3 cloves garlic, minced or 1 heaping tsp of minced jarred garlic
1 1/2 onions, chopped
2 cups celery, chopped
2 cups carrot, chopped
2 cups chicken broth (homemade is the best, but canned works great too!)
2 cups water
4 cups tomato sauce
1 can kidney beans, drained
1-15 oz can green beans, drained
2 cups spinach, rinsed (If using baby leaves, don't chop. If using mature leaves, run a knife through the pile of leaves once or twice to prevent any huge leaves from making it into the soup)
2 zucchinis, quartered and chopped
1 T dry oregano
1 1/2 T dry basil
about 1/2 tsp black pepper, to taste
kosher salt to taste
1/8-1/4 tsp cayenne pepper
1 cup seashell pasta
Parmesan cheese, for serving

In a large, heavy bottomed pot, heat oil over medium heat. Add garlic and cook until softened, about 1-2 minutes. Add onions and cook, stirring occasionally for 4-5 minutes. Add celery and carrots and cook for 2-3 minutes.

Stir in chicken broth, water and tomato sauce. Stir mixture well and bring to a boil. Add kidney beans, green beans, spinach, zucchini, oregano, basil, a little salt, black pepper, and cayenne pepper. Stir well and bring to boil. Reduce to simmer and cook for about 35 minutes.

Meanwhile, cook seashell pasta according to package directions until noodles are al dente. Don't cook the noodles until they are mushy because most likely you will be reheating leftovers of this soup and you don't want the noodles to be too squishy when the soup is reheated. Drain noodles and set aside until the soup is finished simmering.

Once soup has cooked for 35 minutes, taste it to see if the vegetables (namely the zucchini and carrots) are done the way you would like. If needed, simmer the soup a little longer. Add salt and pepper to taste. Pour in the cooked noodles and stir well.

Serve topped with freshly grated Parmesan cheese.

ing.

:: watching as the clouds move slowly across the sky this morning. It is supposed to be a colder day today and I'm looking forward to some homemade minestrone soup.
:: sitting near my Christmas tree enjoying the glow of the lights in my predawn living room.
:: sipping on some Ozo coffee to celebrate St. Nicholaas.
:: hoping I can get to some sewing today and finish a few orders for the shop.

Sunday, November 11, 2012

oh sweet owls.


Do you love owls? They seem to be all the rage these days. My Owl Barn has recently published their 2013 free customizeable owl calendar. Choose from over 40 fun owl images (like these shown here!), assign your favorites to each month and print out your calendar!


Monday, October 22, 2012

missing my herb garden

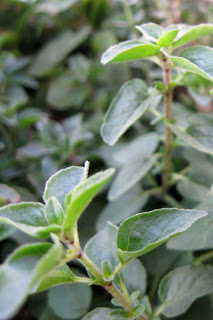
I'm missing my container herb garden tonight.


Red Basil


Oregano

 
Mint

Thursday, October 18, 2012

the post in which you learn I'm not a skilled food photographer.

Well, you likely could tell that already. Moving on...

Deviled Eggs!

Growing up, we ate deviled eggs only once a year, on Easter. We would crack a ton of boiled eggs, mix them with mayo and sprinkle paprika on top. It was also the only time each year that we used paprika. No joke, we had an eons old jar of paprika in the cabinet whose only joy was to be sprinkled on deviled eggs once a year.

Once I discovered this recipe, our family quickly learned that deviled eggs don't need to be confined to once a year feasts or stuffy parties. I don't make them often, but they are a crowd pleaser whenever I put them out.

I don't remember where I found this recipe, but if anyone does know, please let me know so I can credit the right source. I didn't create this recipe myself, but I sure love it!


Deviled Eggs

6 hard boiled eggs
1/4 cup light mayo
1 tsp white wine vinegar (can sub rice vinegar in a pinch)
1 tsp Dijon mustard
1/2 tsp dry dill
1/4 tsp garlic powder
salt to taste

Boil, cool and peel eggs.

Cut in half vertically and place yolks in small mixing bowl. Reserve egg whites.

Using a fork, mash up the yolks and mix with remaining ingredients. Taste mixture and add a little salt to taste.

Carefully scoop a heaping teaspoon of filling back into the reserved egg whites. Serve and enjoy!

Thursday, September 20, 2012

Ridgway trip.

In September, we took a trip down to the Ridgway area. That part of Colorado is so beautiful; the mountain views are striking and the camping is quiet and relaxing.


This year we decided to take a couple of day trips--a drive up Owl Creek Pass and Yankee Boy Basin, in addition to our stops in Ridgway, Ouray and Telluride. Here are a few shots from our week away.

The drive up to Owl Creek Pass
The Aspen Grove

Chimney Rock


Small waterfall on the way to Yankee Boy Basin

Yankee Boy Basin


homemade milk tea with boba.

I sure love me some boba tea, as evidenced by the boba milk tea glamour shot below.


I decided to try making it at home a few days ago and it was so fun and delish I thought I would share my recipe here.

I started by making a super strong cup of Earl Grey tea. I usually prefer Earl Grey over plain black tea, so I opted for that. You could probably make it with any sort of blackish tea you wanted. In a large mug, I steeped two bags of Earl Grey for 5 minutes (not any longer to prevent too much bitterness). My tea was pretty dark at the end of the steeping. Since I was going to dilute the tea with milk considerably, I wanted the starting point to be pretty dark.


As the tea cooled in the refrigerator, I busted out these quick cooking boba brought to me by a dear friend from the midwest.


I followed the directions on the back of the boba bag and cooked about 1/3 cup of dry boba uncovered at a slow boil for a few minutes until it plumped, then covered for 5 minutes. Easy peasy!


While they were still warm, I put them in the bottom of the glass I planned to mix the drink in. I poured in my cold Early Grey tea and added sweetened condensed milk and 2% milk until I found the perfect balance of tea, milk and sweetener. It was so good!

Friday, August 31, 2012

Corrie ten Boom.

“Worrying is carrying tomorrow's load with today's strength, carrying two days at once. It is moving into tomorrow ahead of time. Worrying doesn't empty tomorrow of its sorrow, it empties today of its strength.” ―Corrie ten Boom

Tuesday, August 28, 2012

thankful.

:: for such great friends and family who have blessed me with a special birthday
:: that fall is coming. I can't wait to drink more tea, wear scarves and be able to leave the windows at my house open without fear of melting
:: that my tomato plant produced at least one tomato. I know, one tomato is a pathetic harvest, but at least I got one

Sunday, August 26, 2012

tomato pie.


Everytime I make this savory pie for dinner, we always talk about how it must be part of a proper hobbit's meal. Doesn't it sound like something hobbits would eat? Tomato Pie and sausages. I can totally picture a table full of hobbits devouring this pie for second lunch, or whatever afternoon meal hobbits eat.

I found myself with a vegetable drawer full of tomatoes a few months ago and searched around on the internet for recipes and ways to use them up. I stumbled on Simply Recipes' post about Tomato Pie and I knew I had to try it. Everything I have made from Simply Recipes has been so good, so I wasn't surprised when it was delish. Since making it that first time, we have it nearly once a week--it is pretty easy to throw together in a pinch.


Tomato Pie
adapted slightly from Simply Recipes' Tomato Pie
 

A 9-10 inch pie crust, baked and ready to be filled
3-4 tomatoes, seeded, squeezed and rough chopped (about 3 cups)
1/2-3/4 cup onion chopped
3/4 cup basil, rolled and chopped finely
2 cups shredded cheese, a mixture of sharp cheddar and Monterey Jack
3/4 cup mayonnaise
about a tsp of hot sauce (I use Sriracha because that's usually what I have on hand)
salt and pepper to taste
 
Preheat oven to 375 F.
 
Spread onions in an even layer in the bottom of the pie crust. Top with a thick layer of chopped tomatoes. Sprinkle basil over the tomatoes.
 
In a separate bowl, mix mayonnaise, cheese and hot sauce. Add salt and pepper to taste.
 
Carefully top the pie with an even layer of the mayo cheese mixture. I use my hands to pat out thin hamburger pattie like pieces of the topping, then tamp them down on top of the tomatoes. There should be enough topping to evenly cover the entire top of the pie.
 
Bake for 30-40 minutes until the cheese is hot and bubbly. Cool for 7-10 minutes and serve.
 
**A note about pie crust: I am cheap and too lazy to make my own pie crust, so I always buy the premade type from the store. It is important to follow the directions on the package to pre-bake the crust properly.


Saturday, August 25, 2012

ing.

:: relaxing with the husband on a Saturday
:: dreaming up plans for our next vacation
:: thinking about how cool it would be to be able to see all the things on the bottom of the ocean. Don't you just wonder what all is sitting down there?
:: having fun getting this new blog all set up and pretty